
I recently did a family workshop at Chelmsford Museum where I taught people to make patterned pennants using simple block printing. I've taught at this day for a few years and I love doing something that people probably haven't done before, but also something that they can recreate if they wish to.
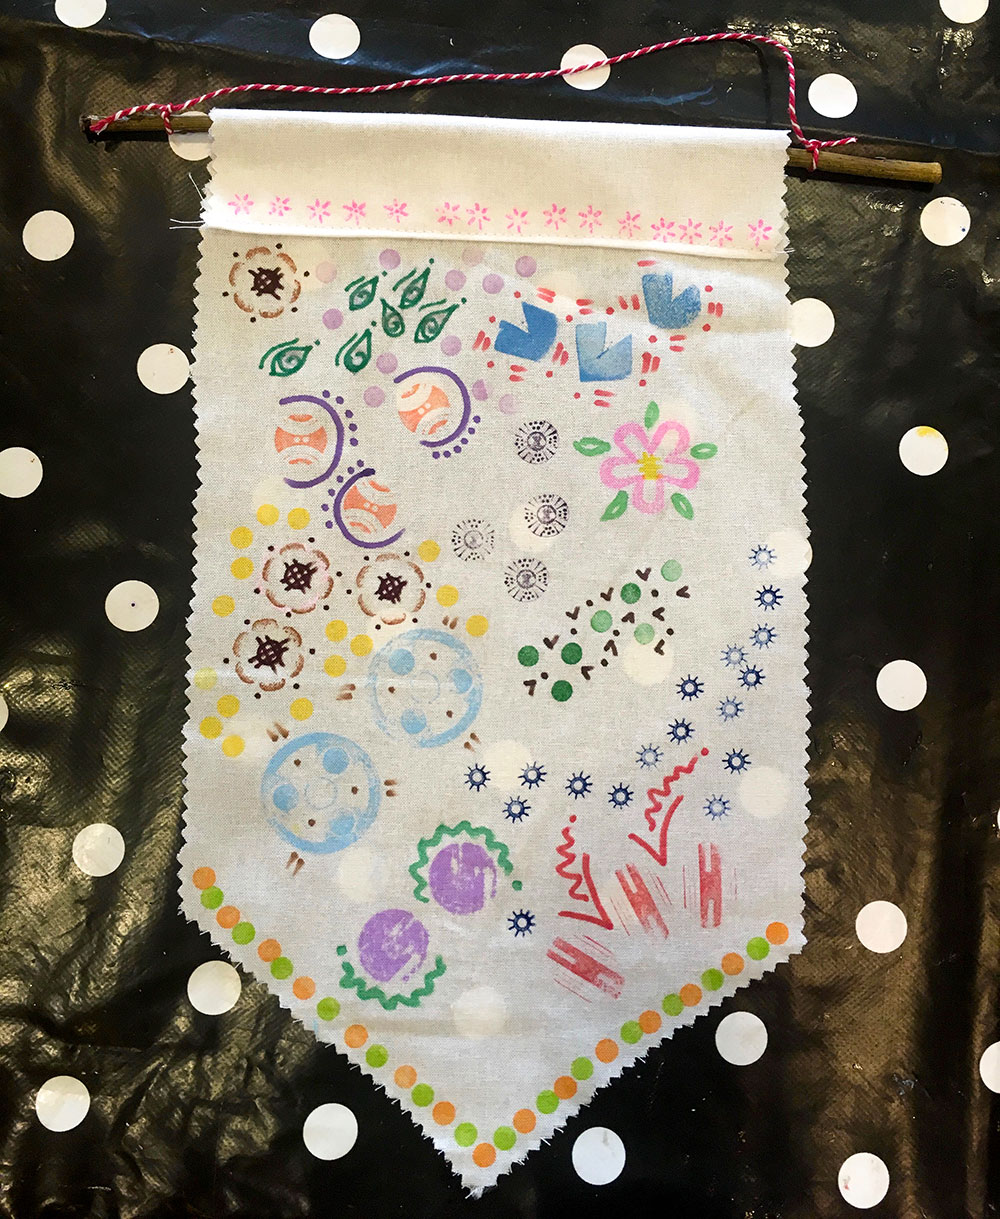
Pennants have been in fashion for a little while now and I think they're the perfect canvas for some printing, I love that you can print and then hang straight up on the wall - for children I always think this is such a lovely thing to do, as I love how much confidence they gain from seeing their work on display.
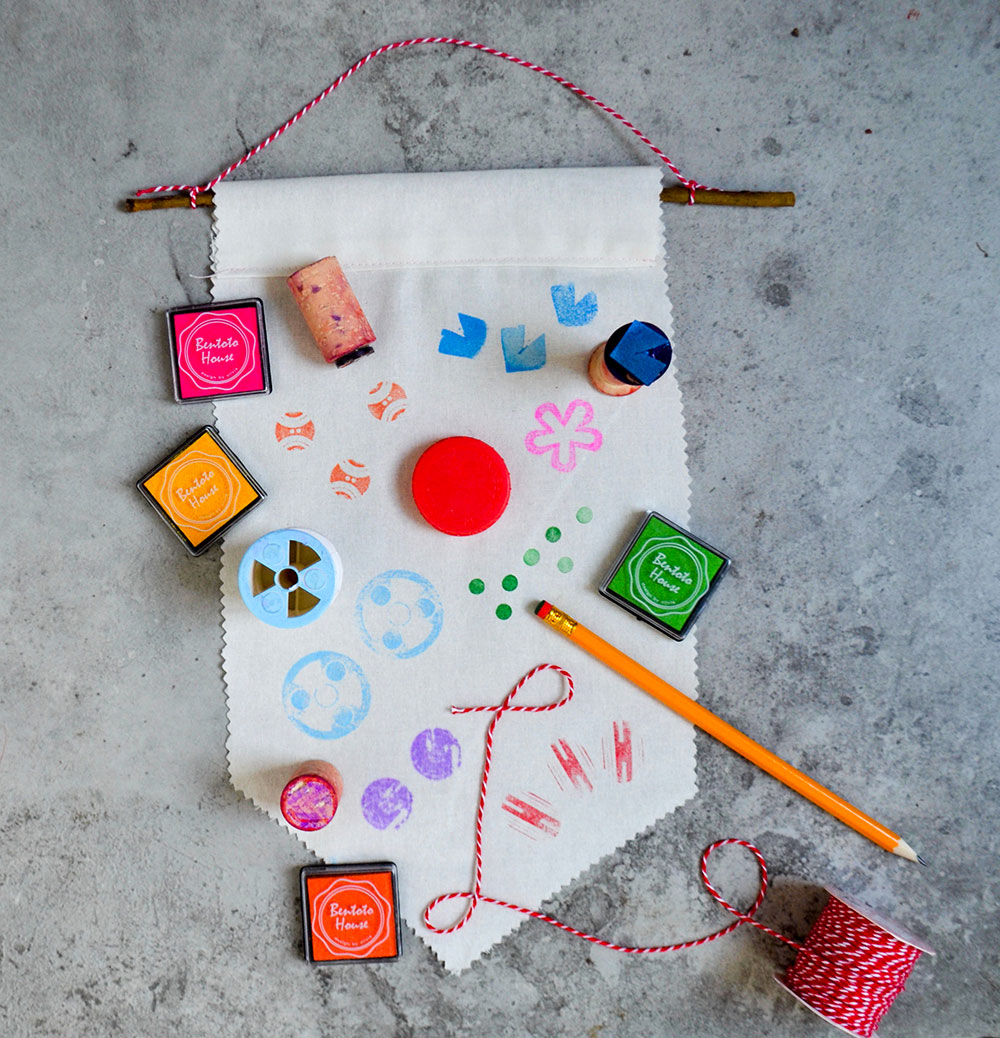
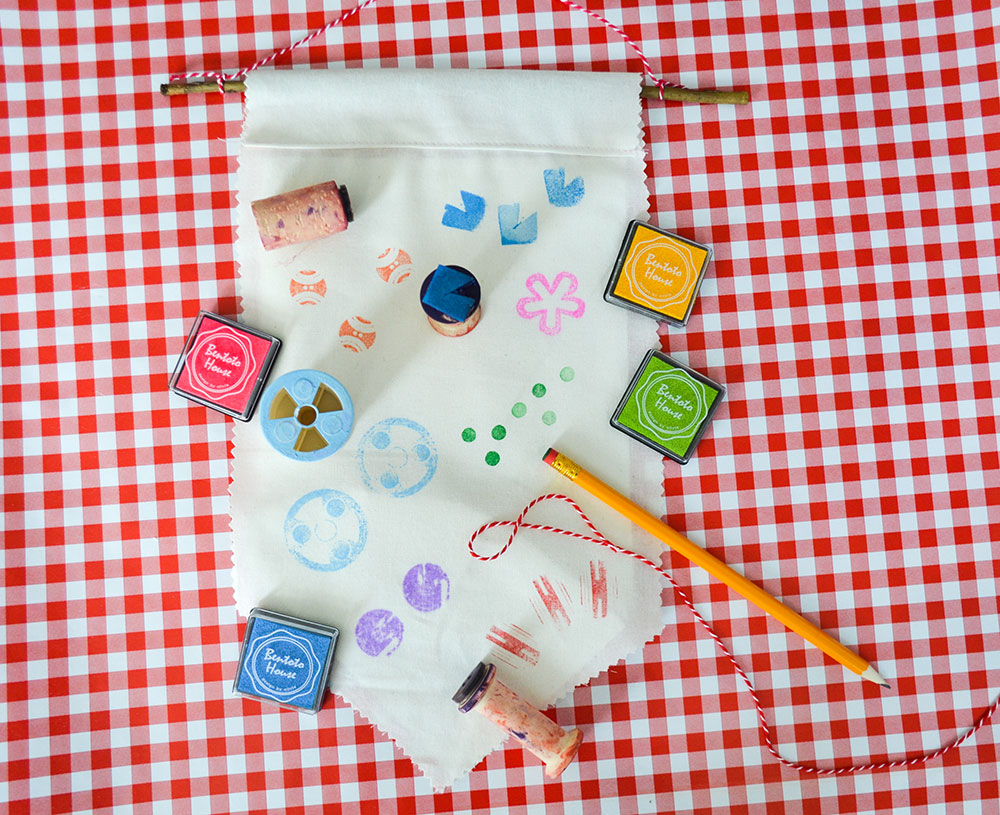
This is my sample that I added to throughout the day to show the families how to print.
Its so simple I don't really have a proper step by step, but here's a rough guide to how I made mine.
To make the pennant: I made a cardboard template of the shape I wanted for the pennants, I went for a rectangular shape with a pointed end which I liked, but I think a triangular shape would be nice too. I then drew around the template and cut out with pinking shears - if you wanted to you could turn under and sew but I really wanted to keep it loose and rustic - I also think it makes you a little less precious when doing the printing too which makes for much better results.
I then folded over the top of the pennant and stitched along the edge. This leaves the gap to insert a twig - (a use for those sticks which are forever being bandied about on our school run!!).
Using some twine, then tie a piece onto either end of the twig to create the hanging part, and you're good to go! There are so many uses for these, one parent told me they were going to make some to put their child's badges and rosettes on which is such a good idea.
To make the 'blocks' to print with I used a mixture of corks, old cotton reels and other small tube like bits and pieces (sweetenr tubes, chocolate spinkles pots etc) as the base and then glue gunned things on top. Buttons are fantastic to print with - the more intricate the better, a great way to use up a stash - my collection is a little out of control! but they give such impressive results. Other things that work well are bits of foam cut up, small plastic bottle tops and lids. The rubbers on the end of pencils create perfect polka dots, and felt tip pen lids make lovely little star like shapes. There are so many different things you could try - there's also the classic potato, apple and other fruit and vegetable printing. I used ink pads here as the blocks where all quite small and it was nice to have a big variety of colours, but you could just as easily use paint for bigger pieces, althought you may loose detail on more intricate blocks like buttons etc.
You can also embelish the prints in lots of ways, I just gave the children pens, but you could add beads, puffy paint, glitter and tassles around the edge of the flag.
I'm planning on getting the girls to do one together to go on our gallery wall in the kitchen, I'll post a picture when I've put it up! Let me know if you have any other tips or tricks with block printing, and also if you have a go and haven't tried it before, I'd love to see!
Tags – Making, Craft, Kids, Things to do with kids, Crafting, DIY, Hobbycraft, Printing, Block printing, Stamps, Workshops, Chelmsford Events, Chelmsford Museum, Culture Essex